通知的使用 通知(Notification)是 Android 系统中比较有特色的一个功能,当某个应用程序希望向用户发出一些提示信息,而该应用程序又不在前台运行时,就可以借助通知来实现。
通知的基本用法 通知的用法还是比较灵活的,既可以在活动里创建,也可以在广播接收器里创建,服务里创建。相比于广播接收器和服务,在活动里创建通知的场景还是比较少的 ,因为一般只有当程序进入到后台的时候我们才需要使用通知。
下面我们就来学习一下创建通知的NotificationManager来对通知进行管理,可以调用Context的 getSystemService() 方法获取到 。 getSystemService() 方法接收一个字符串参数用于确定获取系统的哪个服务,这里我们传入 Context.NOTIFICATION_SERVICE即可。获取到通知服务。
2.接下来需要使用一个 Builder 构造器来创建 Notification 对象,现在只是创建了一个空的 Notification 对象 ,并没有什么实际作用,我们可以在最终的 build() 方法之前连缀任意多的设置方法来创建一个丰富的 Notification 对象
3.调用 NotificationManager 的 notify() 方法就可以让通知显示出来了。 notify() 方法接收两个参数,第一个参数是 id ,要保证为每个通知所指定的 id 都是不同的。第二个参数则是 Notification 对象,这里直接将我们刚刚创建好的 Notification 对象传入即可
1
2
3
4
5
6
7
8
9
10
11
12
13
14
15
16
17
18
19
20
NotificationManager manager = (NotificationManager) getSystemService(Context.NOTIFICATION_SERVICE);Notification notification = new NotificationCompat .Builder(this ) .setContentTitle("This is context title" ) .setContentText("This is content text" ) .setWhen(System.currentTimeMillis()) .setSmallIcon(R.mipmap.ic_launcher) .setLargeIcon(BitmapFactory.decodeResource(getResources(),R.mipmap.ic_launcher)) .build(); manager.notify(1 ,notification);
实现通知的点击效果 PendingIntent从名字上看起来就和 Intent 有些类似,它们之间也确实存在着不少共同点。比如它们都可以去指明某一个“意图”,都可以用于启动活动、启动服务以及发送广播等。 不同的是,Intent 更加倾向于去立即执行某个动作,而 PendingIntent 更加倾向于在某个合适的时机去执行某个动作。所以,也可以把 PendingIntent地理解为延迟执行的 Intent。
主要提供了几个静态方法用于获取PendingIntent的实例,可以根据需求来选择是使用 getActivity() 方法、 getBroadcast() 方法,还是 getService()。
这几个方法所接收的参数都是相同的,第一个参数依旧是 Context ,不用多做解释。第二个参数一般用不到,通常都是传入 0即可 。第三个参数是一个 Intent 对象,我们可以通过这个对象构建出 PendingIntent的“意图” 。第四个参数用于确定 PendingIntent的行为,有 FLAG_ONE_SHOT 、 FLAG_NO_CREATE 、 FLAG_CANCEL_CURRENT 和 FLAG_UPDATE_CURRENT 这 4种值可选 ,每种值的具体含义你可以查看文档,通常情况下这个参数传入 0就可以了 。
这里先是使用 Intent表达出我们想要启动 NotificationActivity的“意图” ,然后将构建好的 Intent 对象传入到 PendingIntent的 getActivity() 方法里,以得到 PendingIntent的实例,
1
2
Intent intent = new Intent (this , NotificationActivity.class);PendingIntent pi = PendingIntent.getActivity(this , 0 , intent, 0 );
接着在 NotificationCompat.Builder 中调用 setContentIntent() 方法,把它作为参数传入即可
取消通知 解决的方法有两种,一种是在NotificationCompat.Builder中再连缀一个setAutoCancel()方法,一种是显式地调用 NotificationManager 的cancel() 方法将它取消。
第一种方法写法如下:
1
2
3
4
Notification notification = new NotificationCompat .Builder(this )... .setAutoCancel(true ) .build();
可以看到, setAutoCancel() 方法传入 true ,就表示当点击了这个通知的时候,通知会自动取消掉。
第二种方法写法如下:
1
2
3
4
5
6
7
8
9
public class NotificationActivity extends AppCompatActivity { @Override protected void onCreate (Bundle savedInstanceState) { super .onCreate(savedInstanceState); setContentView(R.layout.notification_layout); NotificationManager manager = (NotificationManager) getSystemService(NOTIFICATION_SERVICE); manager.cancel(1 ); } }
这里我们在 cancel() 方法中传入了 1,还记得在创建通知的时候给每条通知指定的 id 吗?当时我们给这条通知设置的 id 就是 1 。因此,如果你想取消哪条通知,在 cancel() 方法中传入该通知的 id就行了。
NotificationCompat.Builder中的常用API方法setSound() 方法它可以在通知发出的时候播放一段音频,这样就能够更好地告知用户有通知到来。 setSound()方法接收一个 Uri 参数 ,所以在指定音频文件的时候还需要先获取到音频文件对应的 URI 。比如说,每个手机的/system/media/audio/ringtones 目录下都有很多的音频文件,我们可以从中随便选一个音频文件
1
2
3
4
Notification notification = new NotificationCompat .Builder(this ) ... .setSound(Uri.fromFile(new File ("/system/media/audio/ringtones/Luna.ogg" ))) .build();
setVibrate()方法它是一个长整型的数组,用于设置手机静止和振动的时长,以毫秒为单位。 下标为 0的值表示手机静止的时长,****下标为 1的值表示手机振动的时长,下标为 2的值又表示手机静止的时长 ,以此类推。所以,如果想要让手机在通知到来的时候立刻振动 1秒,然后静止 1秒,再振动 1秒。
1
2
3
4
Notification notification = new NotificationCompat .Builder(this ) ... .setVibrate(new long [] {0 , 1000 , 1000 , 1000 }) .build();
不过,想要控制手机振动还需要声明权限。因此,我们还得编辑 AndroidManifest.xml文件 ,加入如下声明:
setLights()控制手机 LED 灯的显示。当有未接电话或未读短信,而此时手机又处于锁屏状态时,LED 灯就会不停地闪烁,提醒用户去查看。我们可以使用 setLights() 方法来实现这种效果, setLights() 方法接收 3 个参数,第一个参数用于指定 LED 灯的颜色,第二个参数用于指定 LED灯亮起的时长,以毫秒为单位,第三个参数用于指定 LED灯暗去的时长,也是以毫秒为单位。
1
2
3
4
Notification notification = new NotificationCompat .Builder(this ) ... .setLights(Color.GREEN, 1000 , 1000 ) .build();
直接使用通知默认效果 它会根据当前手机的环境来决定播放什么铃声,以及如何振动
1
2
3
4
Notification notification = new NotificationCompat .Builder(this ) ... .setDefaults(NotificationCompat.DEFAULT_ALL) .build();
setStyle() 方法这个方法允许我们构建出富文本的通知内容。也就是说通知中不光可以有文字和图标, 还可以包含更多的东西。 setStyle() 方法接收一个 NotificationCompat.Style 参数, 这个参数就是用来构建具体的富文本信息的,如长文字、图片等。
1
2
3
4
5
6
Notification notification = new NotificationCompat .Builder(this ) ... .setStyle(new NotificationCompat .BigTextStyle().bigText("Learn how to build notifications, send and sync data, and use voice actions. Get the official Android IDE and developer tools to build apps for Android." )) .build();
setStyle() 方法中创建了一个 NotificationCompat.BigTextStyle 对象,这个对象就是用于封装长文字信息的,我们调用它的 bigText() 方法并将文字内容传入就可以了
显示大图片
1
2
3
4
5
Notification notification = new NotificationCompat .Builder(this ) ... .setStyle(new NotificationCompat .BigPictureStyle().bigPicture (BitmapFactory.decodeResource(getResources(), R.drawable.big_image))) .build();
这里仍然是调用的 setStyle() 方法,这次我们在参数中创建了一个NotificationCompat.BigPictureStyle 对象,这个对象就是用于设置大图片的,然后调用它的 bigPicture() 方法并将图片传入 。这里我事先准备好了一张图片,通过 BitmapFactory 的decodeResource() 方法将图片解析成 Bitmap 对象
setPriority() 方法它可以用于设置通知的重要程度。 在 参数都NotificationCompat中
方法接收一个整型参数用于设置这条通知的重要程度,一共有 5 个常量值可选 : PRIORITY_DEFAULT 表示默认的重要程度 ,和不设置效果是一样的; PRIORITY_MIN 表示最低的重要程度 ,系统可能只会在特定的场景才显示这条通知,比如用户下拉状态栏的时候 ; PRIORITY_LOW 表示较低的重要程度,系统可能会将这类通知缩小 ,或改变其显示的顺序,将其排在更重要的通知之后 ; PRIORITY_HIGH 表示较高的重要程度,系统可能会将这类通知放大,或改变其显示的顺序,将其排在比较靠前的位置 ; PRIORITY_MAX 表示最高的重要程度,这类通知消息必须要让用户立刻看到,甚至需要用户做出响应操作
1
2
3
4
Notification notification = new NotificationCompat .Builder(this ) ... .setPriority(NotificationCompat.PRIORITY_MAX) .build();
调用摄像头拍照 1 2 3 4 5 6 7 8 9 10 11 12 13 14 15 16 17 18 19 20 21 22 23 24 25 26 27 28 29 30 31 32 33 34 35 36 37 38 39 40 41 42 43 44 45 46 47 48 49 50 51 52 53 54 55 56 57 58 59 60 61 62 63 64 65 66 67 68 69 70 71 72 73 public class MainActivity extends AppCompatActivity { public static final int TAKE_PHONE = 1 ; private ImageView picture; private Uri imageUri; @Override protected void onCreate (Bundle savedInstanceState) { super .onCreate(savedInstanceState); setContentView(R.layout.activity_main); Button takePhoto = findViewById(R.id.take_photo); picture = findViewById(R.id.picture); takePhoto.setOnClickListener(new View .OnClickListener() { @Override public void onClick (View v) { File outputImage = new File (getExternalCacheDir(), "output_image.jpg" ); try { if (outputImage.exists()) { outputImage.delete(); } outputImage.createNewFile(); } catch (Exception e) { e.printStackTrace(); } if (Build.VERSION.SDK_INT >= 24 ) { imageUri = FileProvider.getUriForFile(MainActivity.this , "com.example.cameraalbumtest.fileprovider" , outputImage); } else { imageUri = Uri.fromFile(outputImage); } Intent intent = new Intent ("android.media.action.IMAGE_CAPTURE" ); intent.putExtra(MediaStore.EXTRA_OUTPUT, imageUri); startActivityForResult(intent, TAKE_PHONE); } }); } @Override protected void onActivityResult (int requestCode, int resultCode, @Nullable Intent data) { super .onActivityResult(requestCode, resultCode, data); switch (requestCode) { case TAKE_PHONE: if (resultCode == RESULT_OK) { try { Bitmap bitmap = BitmapFactory.decodeStream(getContentResolver(). openInputStream(imageUri)); picture.setImageBitmap(bitmap); } catch (Exception e) { e.printStackTrace(); } } break ; default : break ; } } }
因为用到了FileProvider,要在 AndroidManifest.xml中对内容提供器进行注册了
1
2
3
4
5
6
7
8
9
<provider android:authorities="com.example.cameraalbumtest.fileprovider" android:name="androidx.core.content.FileProvider" android:exported="false" android:grantUriPermissions="true" > <meta-data android:name="android.support.FILE_PROVIDER_PATHS" android:resource="@xml/file_paths" /> </provider>
还要再res 创建一个 xml 目录,接着创建一个 file_paths.xml文件。然后修改 file_paths.xml文件中的内容
1
2
3
4
<?xml version="1.0" encoding="utf-8" ?> <paths xmlns:android ="http://schemas.android.com/apk/res/android" > <external-path name ="my_images" path ="" /> </paths >
设置空值就表示将整个 SD卡进行共享,当然你也可以仅共享我们存放 output_image.jpg这张图片的路径
在 Android 4.4系统之前,访问 SD卡的应用关联目录也是要声明权限的 ,从 4.4 系统开始不再需要权限声明 。那么我们为了能够兼容老版本系统的手机,还需要在AndroidManifest.xml中声明一下访问 SD卡的权限
1
2
3
4
5
<manifest xmlns:android="http://schemas.android.com/apk/res/android" package ="com.example.cameraalbumtest" ><uses-permission android:name="android.permission.WRITE_EXTERNAL_STORAGE" /> ... </manifest>
关键知识点 手机 SD卡的应用关联缓存目录。指 SD 卡中专门用于存放当前应用缓存数据的位置 ,调用 getExternalCacheDir() 方法可以/sdcard/Android/data/<package name>/cache。那么为什么要使用应用关联缓目录来存放图片呢?因为从 Android 6.0系统开始,读写 SD卡被列为了危险权限,如果将图片存放在 SD卡的任何其他目录,都要进行运行时权限处理才行,而使用应用关联目录则可以跳过这一步。
如果运行设备的系统版本大于 Android 7.0,就调用 FileProvider的 getUriForFile() 方法将 File 对象转换成一个封装过的 Uri对象。 getUriForFile() 方法接收 3 个参数,第一个参数要求传入 Context 对象,第二个参数可以是任意唯一的字符串,第三个参数则是我们刚刚创建的 File 对象。之所以要进行这样一层转换,是因为从 Android 7.0系统开始,直接使用本地真实路径的 Uri被认为是不安全的,会抛出一个FileUriExposedException异常。 而 FileProvider 则是一种特殊的内容提供器,它使用了和内容提供器类似的机制来对数据进行保护,可以选择性地将封装过的 Uri共享给外部,从而提高了应用的安全性。
Android FileProvider 属性配置详解及FileProvider多节点问题 在android7.0,修改了对私有存储的限制,导致在获取资源的时候,不能通过Uri.fromFile来获取uri了我们需要适配7.0+的机型需要这样写:
1
2
3
4
5
6
7
if (Build.VERSION.SDK_INT > 24 ) { intent.setFlags(Intent.FLAG_GRANT_READ_URI_PERMISSION); Uri contentUri = FileProvider.getUriForFile(context, SysInfo.packageName + ".fileProvider" , outputFile); intent.setDataAndType(contentUri, "application/vnd.android.package-archive" ); } else { intent.setDataAndType(Uri.fromFile(outputFile), "application/vnd.android.package-archive" ); }
创建provider_paths.xml
1
2
3
4
5
6
7
<?xml version="1.0" encoding="utf-8" ?> <paths xmlns:android ="http://schemas.android.com/apk/res/android" > <external-path name ="beta_external_path" path ="Download/" /> <external-path name ="beta_external_files_path" path ="Android/data/" /> </paths >
name:uri路径片段。指的是子目录名。
path:所共享的子目录位置。
各种标签:
1.files-path
代表context.getFileDir()相同的文件路径
2.cache-path
代表与getCacheDir()相同的文件路径
3.external-path
代表与Environment.getExternalStorageDirectory()相同的文件路径,path为空值时表示对整个sd卡的共享。
4.external-files-path
代表与Context#getExternalFilesDir(String) 和Context.getExternalFilesDir(null)相同的文件路径
5.external-cache-path
代表与Context.getExternalCacheDir()相同的文件路径。即使在sd的应用关联缓存目录下
配置AndroidManifest.xml
1 2 3 4 5 6 7 8 9 <provider android:name ="android.support.v4.content.FileProvider" android:authorities ="<pageName>.fileprovider" android:exported ="false" android:grantUriPermissions ="true" > <meta-data android:name ="android.support.FILE_PROVIDER_PATHS" android:resource ="@xml/file_paths" /> </provider >
使用FileProvider
1
2
3
4
5
*** 返回URI:content: File imagePath = new File (Context.getFilesDir(), "images" ); File newFile = new File (imagePath, "default_image.jpg" ); Uri contentUri = getUriForFile(getContext(), "com.mydomain.fileprovider" , newFile);
从相册中选择相片 1 2 3 4 5 6 7 8 9 10 11 12 13 14 15 16 17 18 19 20 21 22 23 24 25 26 27 28 29 30 31 32 33 34 35 36 37 38 39 40 41 42 43 44 45 46 47 48 49 50 51 52 53 54 55 56 57 58 59 60 61 62 63 64 65 66 67 68 69 70 71 72 73 74 75 76 77 78 79 80 81 82 83 84 85 86 87 88 89 90 91 92 93 94 95 96 97 98 99 100 101 102 103 104 105 106 107 108 109 110 111 112 113 114 115 116 117 118 119 120 121 122 123 124 125 126 127 128 129 130 131 132 133 134 135 136 137 138 139 140 141 142 143 144 145 146 147 148 149 150 151 152 153 154 155 156 157 158 159 160 161 162 163 164 165 166 167 168 169 170 171 172 173 174 175 176 177 178 179 180 181 182 183 184 185 186 187 188 189 190 191 192 193 194 195 196 197 198 public class MainActivity extends AppCompatActivity { public static final int TAKE_PHONE = 1 ; public static final int CHOOSE_PHOTO = 2 ; private ImageView picture; private Uri imageUri; @Override protected void onCreate (Bundle savedInstanceState) { super .onCreate(savedInstanceState); setContentView(R.layout.activity_main); Button takePhoto = findViewById(R.id.take_photo); Button choosePhoto = findViewById(R.id.choose_from_album); picture = findViewById(R.id.picture); takePhoto.setOnClickListener(new View .OnClickListener() { @Override public void onClick (View v) { File outputImage = new File (getExternalCacheDir(), "output_image.jpg" ); try { if (outputImage.exists()) { outputImage.delete(); } outputImage.createNewFile(); } catch (Exception e) { e.printStackTrace(); } if (Build.VERSION.SDK_INT >= 24 ) { imageUri = FileProvider.getUriForFile(MainActivity.this , "com.example.cameraalbumtest.fileprovider" , outputImage); } else { imageUri = Uri.fromFile(outputImage); } Intent intent = new Intent ("android.media.action.IMAGE_CAPTURE" ); intent.putExtra(MediaStore.EXTRA_OUTPUT, imageUri); startActivityForResult(intent, TAKE_PHONE); } }); choosePhoto.setOnClickListener(new View .OnClickListener() { @Override public void onClick (View v) { if (ContextCompat.checkSelfPermission(MainActivity.this , Manifest.permission .WRITE_EXTERNAL_STORAGE) != PackageManager.PERMISSION_GRANTED) { ActivityCompat.requestPermissions(MainActivity.this , new String []{Manifest.permission.WRITE_EXTERNAL_STORAGE}, 1 ); } else { openAlbum(); } } }); } private void openAlbum () { Intent intent = new Intent ("android.intent.action.GET_CONTENT" ); intent.setType("image/*" ); startActivityForResult(intent, CHOOSE_PHOTO); } @Override public void onRequestPermissionsResult (int requestCode, @NonNull String[] permissions, @NonNull int [] grantResults) { super .onRequestPermissionsResult(requestCode, permissions, grantResults); switch (requestCode) { case 1 : if (grantResults.length > 0 && grantResults[0 ] == PackageManager.PERMISSION_GRANTED) { openAlbum(); } else { Toast.makeText(this , "You denied the permission" , Toast.LENGTH_SHORT).show(); } break ; default : } } @Override protected void onActivityResult (int requestCode, int resultCode, @Nullable Intent data) { super .onActivityResult(requestCode, resultCode, data); switch (requestCode) { case TAKE_PHONE: if (resultCode == RESULT_OK) { try { Bitmap bitmap = BitmapFactory.decodeStream(getContentResolver(). openInputStream(imageUri)); picture.setImageBitmap(bitmap); } catch (Exception e) { e.printStackTrace(); } } break ; case CHOOSE_PHOTO: if (resultCode == RESULT_OK) { if (Build.VERSION.SDK_INT >= 19 ) { handleImageOnKitKat(data); } else { handleImageBeforeKitKat(data); } } default : break ; } } @TargetApi(19) private void handleImageOnKitKat (Intent data) { String imagePath = null ; Uri uri = data.getData(); if (DocumentsContract.isDocumentUri(this , uri)) { String docId = DocumentsContract.getDocumentId(uri); if ("com.android.providers.media.documents" .equals(uri.getAuthority())) { String id = docId.split(":" )[1 ]; String selection = MediaStore.Images.Media._ID + "=" + id; imagePath = getImagePath(MediaStore.Images.Media.EXTERNAL_CONTENT_URI, selection); } else if ("com.android.providers.downloads.documents" .equals(uri.getAuthority())) { Uri contentUri = ContentUris.withAppendedId(Uri.parse ("content://downloads/public_downloads" ), Long.valueOf(docId)); imagePath = getImagePath(contentUri, null ); } }else if ("content" .equalsIgnoreCase(uri.getScheme())){ imagePath = getImagePath(uri, null ); }else if ("file" .equalsIgnoreCase(uri.getScheme())){ imagePath = uri.getPath(); } displayImage(imagePath); } private void handleImageBeforeKitKat (Intent data) { Uri uri = data.getData(); String imagePath = getImagePath(uri,null ); displayImage(imagePath); } private String getImagePath (Uri uri, String selection) { String path = null ; Cursor cursor = getContentResolver().query(uri, null , selection, null , null ); if (cursor != null ) { if (cursor.moveToFirst()) { path = cursor.getString(cursor.getColumnIndex(MediaStore. Images.Media.DATA)); } cursor.close(); } return path; } private void displayImage (String imagePath) { if (imagePath != null ) { Bitmap bitmap = BitmapFactory.decodeFile(imagePath); picture.setImageBitmap(bitmap); } else { Toast.makeText(this , "failed to get image" , Toast.LENGTH_SHORT).show(); } } }
关键知识点 getContentResolver()的使用ContentProvider提供访问Camera所拍摄的图片,和各种存储文件。要访问到图片真实的路径,可以通过getContentResolver().query(uri, null, selection, null, null)selection为限制条件。通过这个方法来查询图片的存储位置。
打开相册功能 Intent中使用"android.intent.action.GET_CONTENT"
1
2
3
4
Intent intent = new Intent ("android.intent.action.GET_CONTENT" );intent.setType("image/*" ); startActivityForResult(intent, CHOOSE_PHOTO);
动态请求权限 1 2 3 4 5 6 7 8 9 10 11 12 13 14 15 16 17 18 19 20 21 22 23 24 25 26 27 28 29 30 31 32 33 34 choosePhoto.setOnClickListener(new View .OnClickListener() { @Override public void onClick (View v) { if (ContextCompat.checkSelfPermission(MainActivity.this , Manifest.permission.WRITE_EXTERNAL_STORAGE) != PackageManager.PERMISSION_GRANTED) { ActivityCompat.requestPermissions(MainActivity.this , new String []{Manifest.permission.WRITE_EXTERNAL_STORAGE}, 1 ); } else { openAlbum(); } } }); @Override public void onRequestPermissionsResult (int requestCode, @NonNull String[] permissions, @NonNull int [] grantResults) { super .onRequestPermissionsResult(requestCode, permissions, grantResults); switch (requestCode) { case 1 : if (grantResults.length > 0 && grantResults[0 ] == PackageManager.PERMISSION_GRANTED) { openAlbum(); } else { Toast.makeText(this , "You denied the permission" , Toast.LENGTH_SHORT).show(); } break ; default : } }
回调处理 如果是 4.4 及以上系统的手机就调用 handleImageOnKitKat() 方法来处理图片,否则就调用 handleImageBeforeKitKat() 方法来处理图片。之所以要这样做,是因为 Android 系统从 4.4 版本开始,选取相册中的图片不再返回图片真实的 Uri 了,而是一个封装过的 Uri,因此如果是 4.4版本以上的手机就需要对这个 Uri进行解析才行。
1 2 3 4 5 6 7 8 9 10 11 12 13 if (resultCode == RESULT_OK) { if (Build.VERSION.SDK_INT >= 19 ) { handleImageOnKitKat(data); } else { handleImageBeforeKitKat(data); } }
基本步骤
动态请求权限,在点击按钮处设置权限。并设置请求权限回调。
在活动回调时,不同版本号进行不同的解析Uri操作获取到真实地址,并展示图片。
封装获取图片路径和展示图片方法
关于foreground与background的区别 先看字面翻译,background是背景色foreground 也就是前景色 ,也就是说foreground与background相对应,顾名思义,foreground指定的drawable是在view视图的上方绘制的。
foreground可以起到遮罩层效果。
Android Elevation 设置https://www.csdn.net/tags/OtTaIg3sMjQ4Ny1ibG9n.html 资料地址
在Android API21,新添加了一个属性:android:elevation,用以在xml定义View的深度(高度),也即z方向的值。除了elevation之外,类似于已有的translationX、translationY,也相对应地新增了一个translationZ,用以在属性动画中动态改变Z值(使用View.setTranslationZ())
Z = elevation translationZ
在引入了这个属性之后,主要影响有两个:影响View的阴影影响View相互阻挡顺序
影响View的阴影
Z值会对View的阴影外观造成影响,但是不是对View大小造成影响。
拥有更大Z值的View会有一个更大但是更柔和的阴影——这跟我们生活的实际体验是一致的,官方给的效果图:
影响View相互阻挡顺序
拥有更大Z值的View会挡住Z值比较小的View——即更大Z值的View会在最上层。譬如,在正常的FrameLayout中,子View的绘制顺序是从上到下,也就是说,最后一个子View会显示到最上面,如果位置跟前面的View有重合,则会盖住前面的View。
比如,上面的xml代码,效果如下图所示:
先看ViewA、ViewB,因为ViewB是第二个子View,ViewA是第一个,所以B会覆盖在A的上面。
然后ViewC、D,跟AB相比较,区别就在于ViewC多了一个elevation属性,有了一个比ViewD更大的Z值,所以,即使它在ViewD的前面,但是依然能够盖住D~
注意 设置Elevation 属性失效的情况:
\1. 控件必须设置背景色,且不能为透明。
\2. 阴影是绘制于父控件上的,所以控件与父控件的边界之间需有足够空间绘制出阴影才行。
\3. 有网友提出图片尽量使用.png, 防止图片过大导致oom或者elevation失效
\4. 经过本人测试,除了上述原因外,还有:background是图片时、background直接设置具体颜色值时容易无效如:#ffaacc,background是shape时效果最好
5.设置elevation的View最好是ViewGroup子类
attrs中的属性reference:资源ID
dimension:尺寸值
fraction:百分数
color:颜色值
获取到当前主题 1 2 int currentNightMode = getResources ().getConfiguration ().uiMode & Configuration.UI_MODE_NIGHT_MASK;
android实现日夜间模式的三种常用方法 1、使用 setTheme 的方法让 Activity 重新设置主题;
2、设置 Android Support Library 中的 UiMode 来支持日间/夜间模式的切换;
3、通过资源 id 映射,回调自定义 ThemeChangeListener 接口来处理日间/夜间模式的切换。
一、使用setTheme 方法
关键点:**setTheme() 方法一定要在 setContentView() 方法之前调用,否则的话就看不到效果了。**
我们先来看看使用 setTheme 方法来实现日间/夜间模式切换的方案。这种方案的思路很简单,就是在用户选择夜间模式时,Activity 设置成夜间模式的主题,之后再让 Activity 调用 recreate() 方法重新创建一遍就行了。
那就动手吧,在 colors.xml 中定义两组颜色,分别表示日间和夜间的主题色 :
1 2 3 4 5 6 7 8 9 <?xml version="1.0" encoding="utf-8" ?> <resources > <color name ="colorPrimary" > #3F51B5</color > <color name ="colorPrimaryDark" > #303F9F</color > <color name ="colorAccent" > #FF4081</color > <color name ="nightColorPrimary" > #3b3b3b</color > <color name ="nightColorPrimaryDark" > #383838</color > <color name ="nightColorAccent" > #a72b55</color > </resources >
之后在 styles.xml 中定义两组主题,也就是日间主题和夜间主题:
1 2 3 4 5 6 7 8 9 10 11 12 13 14 15 16 17 18 19 20 21 22 <resources > <style name ="AppTheme" parent ="Theme.AppCompat.Light.DarkActionBar" > <item name ="colorPrimary" > @color/colorPrimary</item > <item name ="colorPrimaryDark" > @color/colorPrimaryDark</item > <item name ="colorAccent" > @color/colorAccent</item > <item name ="android:textColor" > @android:color/black</item > <item name ="mainBackground" > @android:color/white</item > </style > <style name ="NightAppTheme" parent ="Theme.AppCompat.Light.DarkActionBar" > <item name ="colorPrimary" > @color/nightColorPrimary</item > <item name ="colorPrimaryDark" > @color/nightColorPrimaryDark</item > <item name ="colorAccent" > @color/nightColorAccent</item > <item name ="android:textColor" > @android:color/white</item > <item name ="mainBackground" > @color/nightColorPrimaryDark</item > </style > </resources >
在主题中的 mainBackground 属性是我们自定义的属性,用来表示背景色:
1 2 3 4 <?xml version="1.0" encoding="utf-8" ?> <resources > <attr name ="mainBackground" format ="color|reference" > </attr > </resources >
接下来就是看一下布局 activity_main.xml:
1 2 3 4 5 6 7 8 9 10 11 12 13 14 15 16 17 18 19 20 21 22 23 24 25 26 27 <?xml version="1.0" encoding="utf-8" ?> <RelativeLayout xmlns:android ="http://schemas.android.com/apk/res/android" xmlns:tools ="http://schemas.android.com/tools" android:layout_width ="match_parent" android:layout_height ="match_parent" android:background ="?attr/mainBackground" android:paddingBottom ="@dimen/activity_vertical_margin" android:paddingLeft ="@dimen/activity_horizontal_margin" android:paddingRight ="@dimen/activity_horizontal_margin" android:paddingTop ="@dimen/activity_vertical_margin" tools:context ="com.yuqirong.themedemo.MainActivity" > <Button android:id ="@+id/btn_theme" android:layout_width ="match_parent" android:layout_height ="wrap_content" android:text ="切换日/夜间模式" /> <TextView android:id ="@+id/tv" android:layout_below ="@id/btn_theme" android:layout_width ="match_parent" android:layout_height ="wrap_content" android:gravity ="center_horizontal" android:text ="通过setTheme()的方法" /> </RelativeLayout >
在 的 android:background 属性中,我们使用 “?attr/mainBackground“ 来表示样就代表着 RelativeLayout 的背景色会去引用在主题中事先定义好的 mainBackground 属性的值。这样就实现了日间/夜间模式切换的换色了。
最后就是 MainActivity 的代码:
1 2 3 4 5 6 7 8 9 10 11 12 13 14 15 16 17 18 19 20 21 22 23 24 25 26 27 28 29 30 31 32 33 34 35 36 37 38 39 40 41 42 43 44 45 public class MainActivity extends AppCompatActivity { private int theme = R.style.AppTheme; @Override protected void onCreate (Bundle savedInstanceState) { super .onCreate(savedInstanceState); if (savedInstanceState != null ){ theme = savedInstanceState.getInt("theme" ); setTheme(theme); } setContentView(R.layout.activity_main); Button btn_theme = (Button) findViewById(R.id.btn_theme); btn_theme.setOnClickListener(new View .OnClickListener() { @Override public void onClick (View v) { theme = (theme == R.style.AppTheme) ? R.style.NightAppTheme : R.style.AppTheme; MainActivity.this .recreate(); } }); } @Override protected void onSaveInstanceState (Bundle outState) { super .onSaveInstanceState(outState); outState.putInt("theme" , theme); } @Override protected void onRestoreInstanceState (Bundle savedInstanceState) { super .onRestoreInstanceState(savedInstanceState); theme = savedInstanceState.getInt("theme" ); } }
在 MainActivity 中有几点要注意一下:
1、调用 recreate() 方法后 Activity 的生命周期会调用 onSaveInstanceState(Bundle outState) 来备份相关的数据,之后也会调用 onRestoreInstanceState(Bundle savedInstanceState) 来还原相关的数据,因此我们把 theme 的值保存进去,以便 Activity 重新创建后使用。
2、我们在 onCreate(Bundle savedInstanceState) 方法中还原得到了 theme 值后,setTheme() 方法一定要在 setContentView() 方法之前调用,否则的话就看不到效果了。
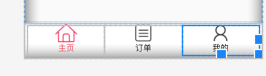
在Android中搭建图标+文字的按钮显示效果如下图:
使用RadoiGroup来包含三个RadioButton
1 2 3 4 5 6 7 8 9 10 11 RadioButton android:id="@+id/note" android:layout_width="0dp" android:layout_height="75dp" android:layout_weight="1" android:button="@null" android:checked="true" android:drawableTop="@drawable/ic_chevron_left_24" android:gravity="center" android:text="@string/btn_note" android:textAlignment="center" />
android:textAlignment="center":设置文本居中,需gravity属性配合使用 android:gravity="center"
android:checked="true"设置默认选中
android:drawableTop="@drawable/ic_chevron_left_24"将图片设置在上面
Android中通过Typeface设置字体 Android系统默认字体支持四种字体,分别为:
noraml(普通字体,系统默认使用的字体)sans(非衬线字体)
serif(衬线字体)
monospace(等宽字体)
一、使用系统自带的字体(有2种方式) 1.在xml 中修改字体。
2.在Java代码中修改字体。
第一步: 获取TextView实例。
//获取textView实例
//设置serif字体
二、在Android中引入其他字体 第一步:在assets目录下新建fonts目录,把ttf字体文件放到此目录下。
第二步:程序中创建并设置字体。
//实例化TextView
//得到AssetManager
//根据路径得到Typeface
//设置字体textView.setTypeface(tf);
includeFontPadding属性的使用TextView 顶部和底部 默认是有留白的。
android:includeFontPadding="false"就是消除这个默认padding的。
RecyclerView中的findLastVisibleItemPosition()findFirstCompletelyVisibleItemPosition()
findFirstVisibleItemPosition()
findLastCompletelyVisibleItemPosition()
findLastVisibleItemPosition()
两个查找全部可见的 item 方法并不是我们正常意义上的全部可见,而是指在布局方向上是否已全部可见 。说得白点,如果是 HORIZONTAL 水平样式,如上图,那么它只会去计算左右方向上是否全部可见来判定。
Android界面布局属性layout_gravity和gravity的区别 android:layout_gravity是设置该控件相对于父容器对齐方式;android:gravity是设置子元素在该容器内的对齐方式。
在相对布局中layout_gravity和gravity不起任何作用 。当我们使用 android:orientation=“vertical” 时, android:layout_gravity只有水平方向的设置才起作用,垂直方向的设置不起作用。即:left,right,center_horizontal 是生效的; 当 我们使用android:orientation=“horizontal” 时, android:layout_gravity只有垂直方向的设置才起作用,水平方向的设置不起作用。即:top,bottom,center_vertical 是生效的。
当你想要定义只在Android Studio的预览或设计编辑器中使用的占位符内容时,就会使用tools名称空间。在编译应用程序时,使用tools命名空间的属性将被删除。例如:设置TextView时,想要看到效果如何,就可以使用tools:text该命名空间属性。名称空间用于在引用具有相同名称的属性时帮助解决歧义问题。例如,标记中的这两个属性具有相同的名称(src),但名称空间不同。
targetSdkVersion 等理解compileSdkVersion采用哪个版本的Android SDK编译自己的应用,应用的使用API级别不得高于编译用的SDK的版本。如果新增高级别的API调用,那么编译用的SDK版本也要随之升高。(换句话说就是compileSdkVersion最好和targetSdkVersion版本一致)
minSdkVersion应用可以运行的最低要求版本 ; 低于`minSdkVersion`的Android系统无法安装此应用Google取决于支持额外3%的设备
targetSdkVersion如果设置为22,那么23以及23以后的所有新特性、新功能和API新行为统统无视;只认识22以及22之前提供的功能和API行为;targetSdkVersion=23)以后,提供了权限管理功能,危险权限不仅要在清单文件中声明,也要代码动态向用户申请。
会被包含到APK中,并在运行阶段起作用
如果设置为targetSdkVersion=22,无论是一般权限还是危险权限,依旧只需要在清单文件中声明,不需要动态申请。targetSdkVersion是Android提供向前兼容的主要依据 。targetSdkVersion更新到最新版SDK。targetSdkVersion,一定要充分测试!
总结 三者关系minSdkVersion <= targetSdkVersion <=compileSdkVersionminSdkVersion覆盖大人群。用最新的targetSdkVersion和compileSdkVersion版本获得最好的外观和行为。